Send Emails in Node.js with Gmail SMTP using Nodemailer
-min.jpg)
Sending emails from your Node.js application is something many people need to do. This can be for things like checking user identity, recovering passwords, sending notifications, and sharing newsletters. In this blog post, we will explain how to send emails automatically in Node.js using Gmail's SMTP server. We will use the Nodemailer package, which is a well-known and simple Node.js tool for sending emails.
Why Use SMTP for Sending Emails in Node.js?
SMTP is the primary protocol to transfer emails. Using SMTP, you can send emails directly from your Node.js app without requiring a third-party service. Nodemailer simplifies many of the complications associated with the process of sending emails.
Sending Email in Node.js Using Gmail's SMTP Server
1. Setup Gmail for SMTP Access
Before you can send emails using Gmail's SMTP server, make sure your Gmail account is ready to send emails automatically.
- Enable 2-Step Verification: To make it more secure, turn on two-factor authentication (2FA) for your Google account if you have not done it yet.
Create an App Password: After you turn on 2FA, you will need to create an App Password just for sending emails through SMTP. - Go to Google's App Passwords page.
- Choose the app (for example, "Mail") and device (for example, "Other" with a custom name, such as "Node.js App").
- Google will create a 16-character app password for you. Use this password in your SMTP setup instead of your regular Gmail password.
Install Nodemailer
Nodemailer is a simple and strong library that helps you send emails in Node.js. First, we need to install it in your project:
1. Start a Node.js Project (if you haven't done it yet):
npm init -y
2. Install Nodemailer:
npm install nodemailer
3. Send Email Using Gmail SMTP with Nodemailer
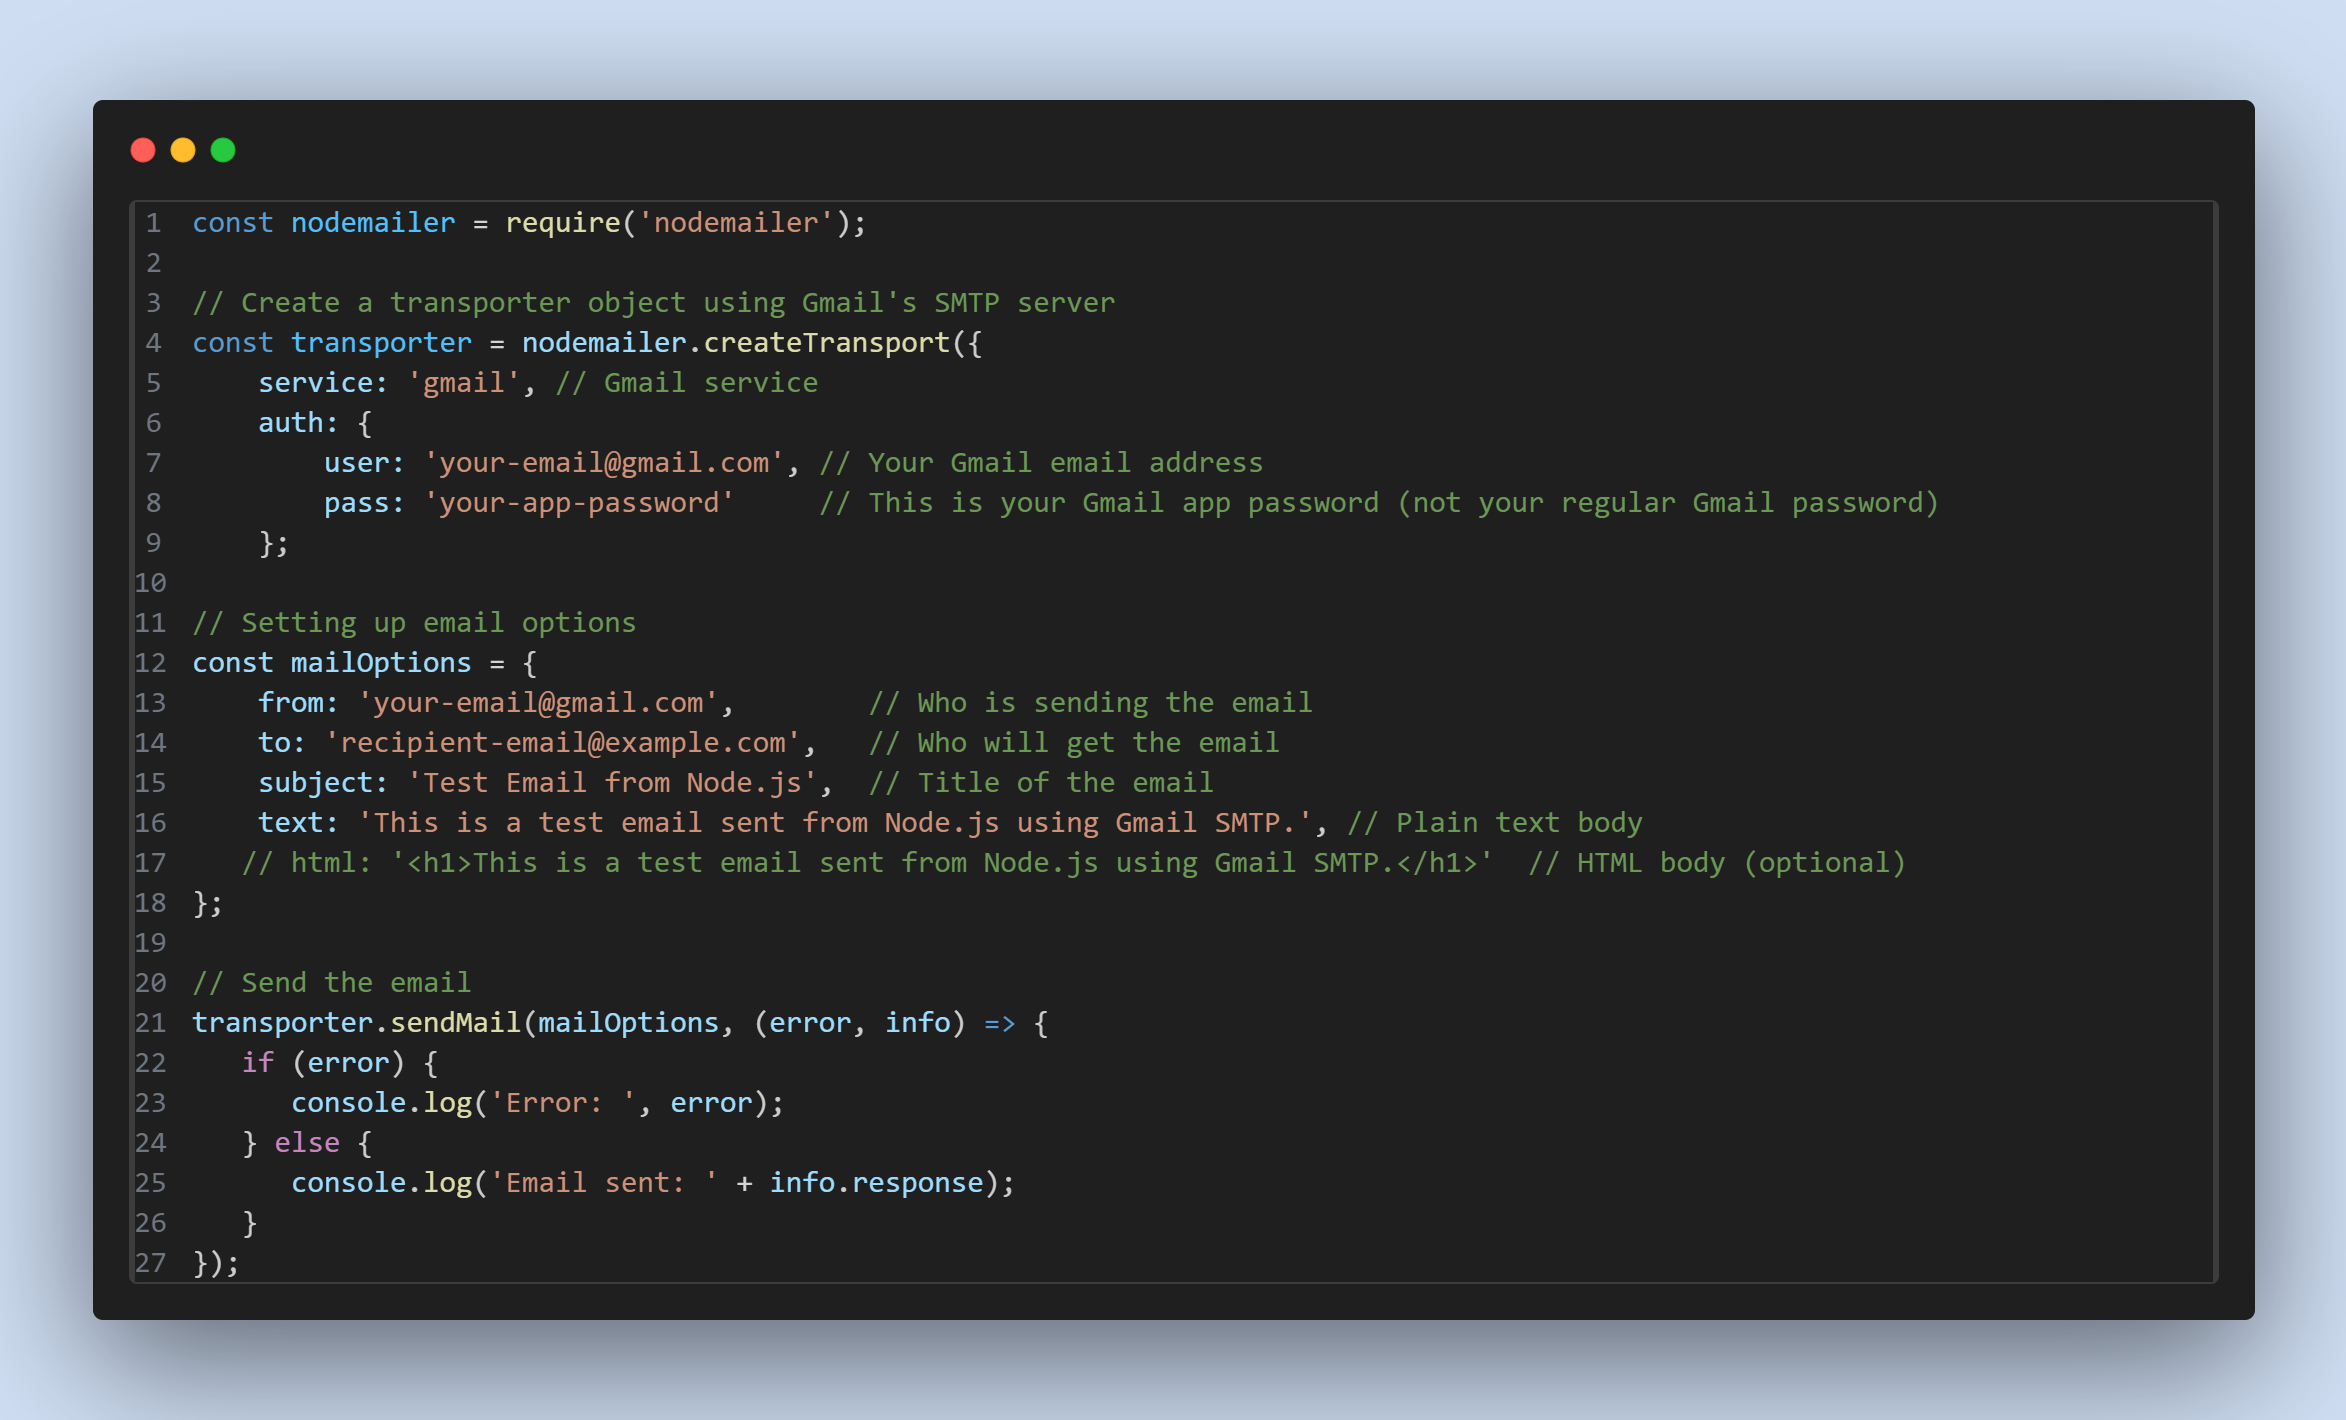
Now, that Nodemailer is installed you can use Gmail's SMTP server to send an email. Below is an example of how this can be achieved.

Explanation of the Code:
1. Creating the Transporter: The `transporter` object is created using Gmail's SMTP server (`smtp.gmail.com`) and your login details (Gmail address and app password).
- `service: 'gmail'`: Tells Nodemailer to use Gmail's SMTP server.
- `auth`: Contains the Gmail login details (`user` and `pass`).
2. Defining the Email Options:
- from: The email address of the sender.
- to: The recipient's email address.
- subject: The subject of the email.
- text: The plain text content of the email. You can also use html if you want to send HTML emails.
3. Sending the Email: The `sendMail` method sends the email. If successful, it will print the response; if there's an error, it will log the error.
4. Execute the Node.js Email Script
To send the email, simply run your Node.js script:
node sendEmail.js
If everything is set up correctly, you should see a response in the console like:
Email sent: 250 2.0.0 OK. (response details)
This means the email has been sent successfully! The recipient should receive the email within a few seconds.
Additional Resources:
- Nodemailer Documentation: Nodemailer Docs
- Google SMTP Settings: Gmail SMTP Settings
- Nodemailer Example with OAuth2: OAuth2 with Nodemailer
- Using Environment Variables: dotenv Documentation